Lime paint for facades
Post from EditorialsThe lime paint, together with the fresco, is one of the most common techniques used for centuries for the painting and decoration of facades
The lime paint, or dry-fresco
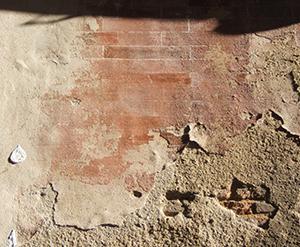 The lime paint, or dry-fresco, is one of the most widely used techniques for the painting and decoration of facades.
In city centers it is therefore very frequent, and indeed is often explicitly prescribed for the maintenance of the historic buildings.
It is therefore essential to know the correct method of execution because the quality of the end result, that is a facade with consistent colors and any decorative details well defined, depends only on the skill of the performer.
The lime paint was particularly suitable for the production of coloring plain or simply decorated with trompe l'oeil architectural structures in more modest houses: in fact, compared to the Fresco it has some advantages, including especially a much lower cost to the ability to make changes and corrections even in the finished work.
This makes possible the use of less skilled workers and enables faster processing.
The techniques of execution
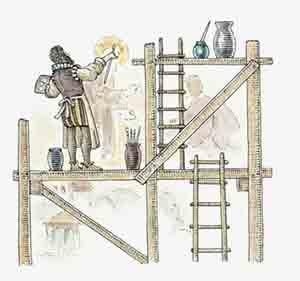 The essential difference compared to the fresco consists in the application of colors when the plaster is completely or partially dry.
This, as already mentioned above, also allows you to carry out changes even when the work is finished and to operate on larger areas, because it is no longer necessary to divide the decoration in days (ie smaller portions to achieve mandatory on wet plaster).
In the case of a facade in dry-fresco, any decoration is therefore made according to the method of pontate, ie proceeding by horizontal bands about two meters high and coincident with the work plans of the scaffolding (hence the name).
In a simple one-color painting course not need any preliminary drawing, while for the more complex decorations, with architectural structures painted trompe l'oeil and/ or patterned as strips or diamonds, it is not necessary a network of guidelines, obtainable in two ways.
For horizontal or vertical lines, it is enough to beat on the facade a plumb or a horizontal string soaked in pigment, while for the most complex parts (gables, capitals of pilasters, plant elements, etc.) is used generally the technique of dusting.
The detail to draw is life-size (ie 1: 1) on a large sheet, called carton, and the contours of the drawing are densely pierced with an awl; then we lean the cardboard to the support and follow the holes with a swab soaked in pigment or charcoal.
For clarity, you can further emphasize the trace obtained with a sign with a brush.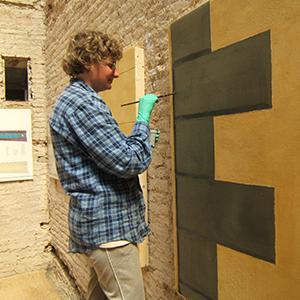 At this point it switches to the proper painting, applying colors with two different systems:
- In a single hand with very thick and opaque layers (system very fast and economical, which, however, produces opaque tints and lackluster due to dilution of the colors in the milk of lime);
- With the method of the veiling, more refined compared to the previous one.
In this second case are used in fact more coats, generally three: the first coat, the preparatory layer, it is generally constituted by a simple whitewash with milk of lime, on which we apply the other colors, proceeding from light to darker.
Once the background is ready we start the execution of the elements of decoration: the first outlines of the architectural; then the highlights, obtained with touches of white and black, absolutely essential to give the illusion of depth.
To get perfectly straight lines, as a guide for the brush was last used a ruler or a wooden board.
How to recognize a dry-fresco decoration
Although the end result is quite similar, generally it is unable to distinguish the lime paint the fresco thanks to several characteristics. 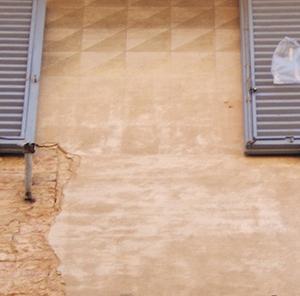 In fact, although the typical forms of degradation (leaching of the paint film surface, disintegration / pulverizing the plaster and surface deposits in parts undercut) almost always coincide, a dry-fresco decoration does not provide the preparatory engraved drawing.
In addition, in the case of glazing realization the progressive washing away of the paint film sometimes shows the brush strokes, almost always horizontal, as in the photo on the left.
In drawing color in one coat thick and covering the paint film it tends to detach from the holder and subsequently to fall, forming gaps from the edges like torn sheets.
The pigments and the preparation of colors
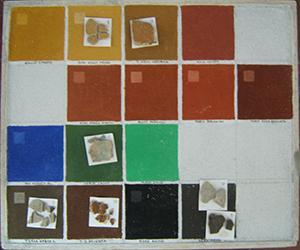 The pigments used in the preparation of the colors are mainly of mineral origin: particularly suitable for this purpose are in fact the colored earths, constituted by clay with mineral impurities, whose type and quantity determine the final gradient.
The main responsible of these colors are the iron compounds: minerals such as hematite or limonite lead to a color in shades of red or yellow, while other oxides in the green earth enable to obtain a range of green and blue low tones.
For brighter shades, more saturated you had instead to resort to much more rare minerals, therefore very expensive, such as malachite green, and lapislazuli for blue, for their considerable value were rarely used in the painting of exterior plaster, if not for decoration in religious subjects and in buildings of great value such as churches, convents and palaces.
A pretty cheap sustitute was the so called false blue, a mixture of white, black and little red that produces a bluish-gray color.
White was frequently obtained from the milk of lime and so was the cheapest color; Black was simple carbon black or coal dust.
The vine black was obtained for example by milling the coal, obtained by burning the wood of this plant.
Once collected in special pits or deposits, the earthes were subjected to washing, drying and sieving, then finely ground to obtain homogeneous powder.
To prepare the color, it was necessary to dissolve the pigments very thoroughly in clean water, to avoid that, once spread the color, you experience unpleasant stains.
Subsequently they were mixed milk of lime or slaked, stirring well to avoid lumps.
79806 REGISTERED USERS


