Installing the drive voltage
Post from EditorialsIn many dwellings that have electrical installations can arise the need for use of variable voltage for controlling the spread of light.
For modern homes you can find lighting solutions that combine the lighting requirements, the design, power consumption, and greater respect for the environment.
However, in many homes already equipped with installations in operation may arise the need for use of variable voltage for controlling the spread of light.
A voltage regulator can be easily mounted with the typical tools of the hobby projects at home and taking the necessary precautions.
Tools and conditions to install the voltage regulator
 In general the drives are devices capable of providing an alternating voltage variable with continuity from the value zero to the value of the mains voltage (230 V 50 Hz).
The typical set of screwdrivers and phase detector electricians with their scissors and stripping cables are the tools necessary to perform the job of installing a voltage regulator.
The precaution necessary to be taken is to disconnect the electricity in the apartment where we want to install the voltage regulator. The work can be, therefore, carried out with natural light or with the aid of portable lighting devices.
The drive voltage can be easily purchased, in a store of electrical equipment, the choice can be made ??depending on the type of lamp (and power) of which we want to check and adjust the diffusion of light. The drives are generally characterized by a set of nominal values ??of electrical parameters with which they work.
For a common single-phase system (voltage 230 V) are, for example, power ranges and employs drives ranging from 50 W to 200 W. Values. The latter, typical values, of the powers of reference for the common lighting fixtures in the house. Another simple test to do is to match the overall dimensions of the switch to be replaced with the drive voltage and the latter.
Installing the drive voltage and further verification
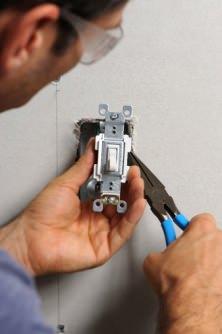
 Identified the switch, in correspondence of which must be installed the drive voltage, the operation to be done is to remove the plate of the box containing the switch. The plaques older are generally screwed to the box, the less dated are interlocking, in any case the operation is very simple.
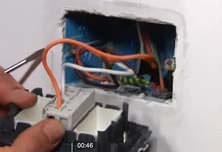
The metallic part containing the switch (fruit) must be pulled out of the box to unscrew the cables connected to the switch, the phase and neutral. It is appropriate to read the instructions of the drive voltage before proceeding with its installation, in particular watch the frame of reference for the connection of the phase and neutral. In general, even the simplest of voltage variators, offers three terminals of reference for the connection of electrical cables. Only two, of course, of these terminals must be used in replacement of the drive with the switch connected to the lamp to be controlled.
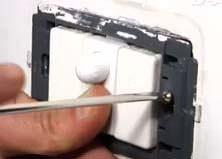
Connect the wires and inserted the drive to place the switch in the metal support, we have to fix and fix everything in the electrical box and then replace the plate initially removed. The correctness of the installation of the drive voltage do and its operation, can be used as an opportunity to conduct a review of a general nature on the electrical system of the house.
Simply, it can be verified to tripping the RCD (better known as GFCI) or of all those present, using the appropriate key test, the test should be carried out generally on a monthly basis. Furthermore, having to hand tools and devices for electrical work DIY at home, after the reactivation of the current, can also be carried out a verification of the value of the resistance of the ground plant.
79741 REGISTERED USERS


