How to Repair a piece of forniture
Post from EditorialsThe restoration of a piece of furniture should never be approached without an examination of your ability, the work to be performed and the value of the furniture on which to operate.
Various repairs on furniture
The restoration of a piece of furniture should never be addressed without a clear and objective examination of ones ability, the work to be performed and the value of the furniture on which one intends to operate.
Especially the first times, when you do not have experience, it is better not to "get your hands" on a piece of furniture that have a certain value (for those of great value is always necessary to hire specialists in the restoration), but it is good to start with something simple of low value.
If, however, it happens to work on an "old" piece of forniture, the risk is more content and can be approached by anyone.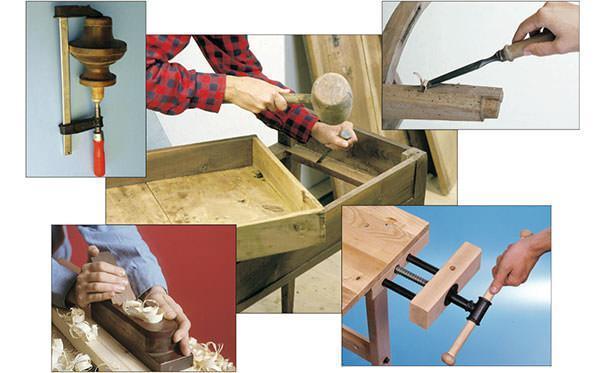
Before proceeding please consider the "health" of the piece of forniture in question: if it is wobbly, if the drawer slides have deteriorated or if some panel is missing, or some component is split.
In these cases it is necessary to perform the repairs before the actual restoration.
Even if the damage does not make it necessary the best way to tackle the job is to completely disassembly the cabinet.
This will make it possible to reconstruct the entire structure with firmness, restoring rickety joints and being able to reach inside parts otherwise not fixable.
Removing the cabinet
To disassemble the cabinet you must detach his joints.
The glues used in old furniture, were of animal origin and were obtained by boiling skin, cartilage, etc..
The animal glues come in layers and yellowish, dry, tend to crumble easily.
They maintain a tenacious adhesive power even after a long time, so it takes some care to work or you risk breaking the joints.
To soften the bonding we adopt the classical system of wet repeatedly points glued with hot water, making it penetrate well, even with a syringe.
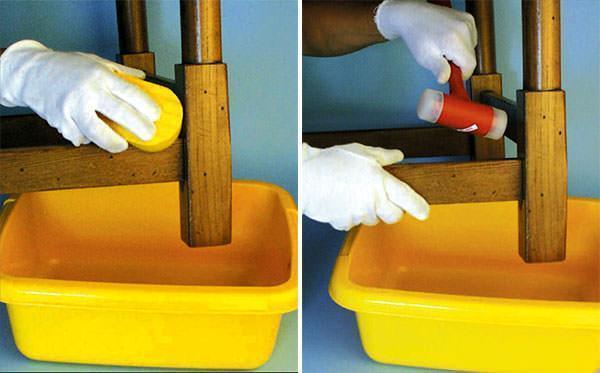
Left: To loosen the joints glued with animal glue you use hot water which is applied on the joint.
The glue, little by little, becomes loose and the joint can be freed.
Right: When the glue loosens its grip on the pieces to separate with a plastic mallet, or, failing that, by inserting pieces of wood so as not to mark the cabinet.
In this way, the adhesive softens considerably and loses its power of bonding.
To do this more quickly you should keep at hand an electric cooker plate that maintains the water hot for as long as necessary.
If the frame is also reinforced by nails or screws you have to remove them with different methods.
If you decide to pull out the nails with pliers, a tablet interject a small waste wooden board not to dent the surrounding area.
To remove hard screws, use an electric screwdriver or a battery.
The screws and nails "vintage" that extract from the wood of a cabinet should be kept, in order to be reused during the reassembly as possible to maintain the originality of construction.
If you can, replace damaged nails or screws with others, always old, salvaged from demolished parts of furniture.
To disassemble the joints using a mallet with plastic head, remembering to interpose between this and a mobile tablet that prevents dents and evenly distributes the blow.
When the cabinet is completely disassembled to repair the joints thoroughly clean the glue residue and carry out necessary repairs.
These repairs can be made of different types and it is impossible to treat them all completely.
Below we give some important tips to deal with in the correct way the most frequent repairs.
Wobbly joints
Spread the glue again and put them in a vise for a day.
If the slots are too wide, apply thin sheets of veneer wet on the parts to be slot in, in order to thicken them properly.

Left: After cleaning the joints, test to see if the pair are "loose".
Hopefully interject sheets of paper or veneer.
At the center: Apply glue (one side only) and assemble the frame.
Right: Clean the excess of glue and put it in a vise for at least 24 hours.
Win the temptation to use nails or screws reinforcement and work as much as possible with the glue.
Damage to the surfaces
The intervention on the shallow incisions is to restore the coating of paint or varnish.
If the coating is opaque paint, sand the part marked with medium-grit sandpaper finish.
Then apply, on the incision, a little wood putty that you spread with a spatula.
When the grout has dried up, rub with sandpaper, dusted, and then reapply the paint.
If the cabinet is finished with varnish, sand the area to be treated and cleaned well.
So with a stick of wax of the appropriate tone, carefully fill the engraved part.
Impacts
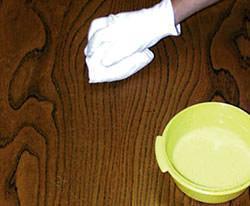 The legs of furniture, chairs and table tops are subject to impacts.
The result is ugly dimples.
An effective intervention is to "revive" the wood fibers crushed by wetting.
You have to apply a wet swab with warm water over the area to be repaired.
With this system, the wood fibers absorb water and swell returning the surface to its original level.
The intervention must be done after removing the paint from the wood coverage or painting.
The swab should be left to work for a few hours if the dimple is small and if the wood absorbs enough you will notice a remarkable improvement in the situation.
In many cases, you can completely restore the original level.
The feet
The parts that are more subjected to damage are the feet.
Among these the "onion" is joined to the cabinet with a round (plug) of wood that is inserted into a hole of the frame and glued.
The straight foot is usually just an extension of the supporting frame, alternatively is applied with screws.
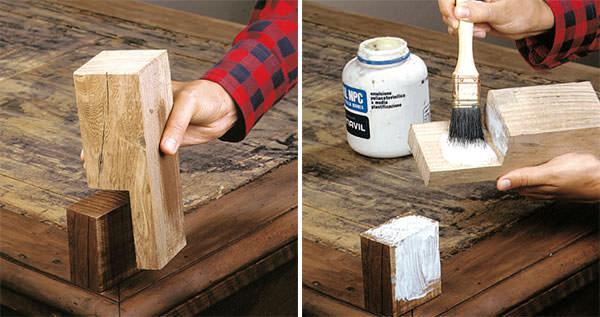
If a foot of straight type is damaged you should cut off the damaged part and create that the same applies with a PVA glue and then paint them.
The "corner" version is constituted by two pieces placed at 90° and connected to the cabinet with screws from the inside of the frame.
When a foot "wobbles" we need to evaluate the problem according to its type.
Generally they have lost their glue or are the screws that attach it to the cabinet are loose.
You have to remove them and remove the old glue.
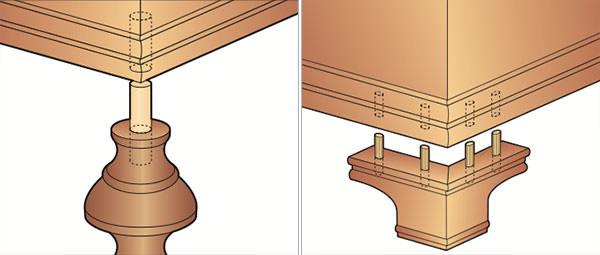
Left: the onion-foot connects to the cabinet restoring the union jack.
Right: one corner foot is reconnected to the cabinet with some glued thorns.
The plug of an onion foot needs to be smeared with glue and reinserted into place.
If there is a "space" between the pin and the hole, you can wrap it with paper before applying the glue on this and into the hole.
Damaged foot
If the bottom of the foot is severely damaged (because of the contact with the ground) it must be rebuilt.

Right: If the lower end of an onion foot is ruined, cut it off, prepare a wooden disc of the same size and glue it yourself.
Left: With a clamp, tighten the glued parts for at least 24 hours.
In an onion foot (or variously worked on a lathe), you must remove with a saw the part to be replaced, then apply with glue a piece of round timber whose diameter is greater than that of the foot.

Left: With medium grit sandpaper work along the edge so as to achieve a well-fitting regular joint.
Right: With a brush dipped in stain, hide the line of contact.
Then you can paint it.
Subsequently, when the bonding is steady, work this additional piece with rasp and sandpaper joining it to the shape of the foot.
Damage to the veneer
The equipment needed to restore a piece of veneered furniture must include the specific hammer to veneer, available in a specialist shop.
If the veneer is removed and raised on the edge of a level or a side, but without breakage, carefully lift the edge up with a small spatula, then with a sharp knife remove any deposits of glue paying particular attention not to push inside any fragments of veneer.
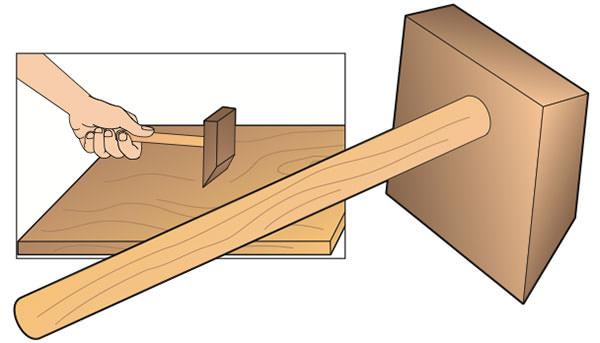
The tool for veneering is a species of wooden gavel with tapered head which serves to smooth the veneer and wet with glue on the surface to be coated, in order to eliminate air bubbles.
Remove with a vacuum cleaner dust and dirt.
Apply the glue in the interior space and press the veneer squeezing out the excess of glue cleaning it immediately with a damp cloth.
Overlay to this part a piece of wood that covers the entire affected area and secure it with a clamp or put some weights on it for at least 24 hours.
If the portion of the veneer has also some voids and cracks, to cover the damaged area up put a new piece of plywood of the same type as the one to be repaired, previously immersed in water.
At the same time, with a cutter, cut the partially ruined part and the new one with regular contours.
With trowel and chisel remove the damaged part to cut, sand the surface lightly and then proceed to gluing the new veneer.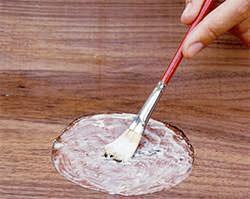 To do so, smear with glue the affected area and apply the workpiece in place with its circumference well in contact with the veneer on the surface.
Bring out the excess glue and apply the tape, then put on the area some weights.
Let them rest 24 hours and then remove the weights.
If the new plywood protrudes from the floor, cut it right with a cutter and then sand it with abrasive paper n. 180, with delicacy.
Presence of bubbles
If the veneer has bubbles pierce them with the cutter following the direction of the grain.
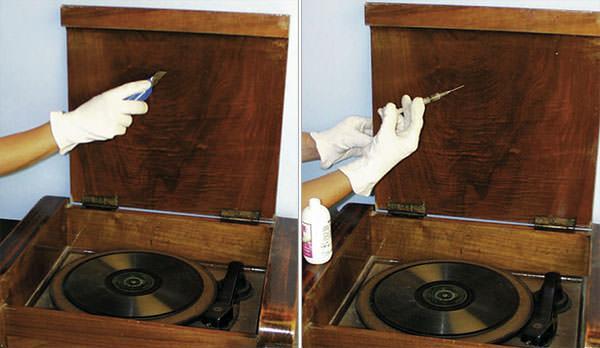
Left: To reduce the visibility of a bubble on the veneer (which can result in a greater detachment) pierce the highest part of the bubble with some nicks with the cutter.
Right: Insert in the nicks the tip of a syringe filled with diluted glue and inject a few drops of glue.
Then press with a damp cloth.
Finally put some weights on.
Then lift the edges of the cut and sneak the glue in it with a syringe, let the excess glue out and press the edges.
Apply the tape and put some weights on it.
The legs
The broken leg of a table can be repaired by drilling a hole of 8-10 mm in the center of the parts to restore contact.
In this hole insert a glued pin along a few centimeters before the stump, at time of mating, even in the part of the leg connected to the cabinet.
The glue that is "squeezed" out needs to be cleaned.
Drawers
The main damages are two: the twisting of the drawer and the loosening of the joints.
Often the joints of the front are dovetailed and are difficult to remove.
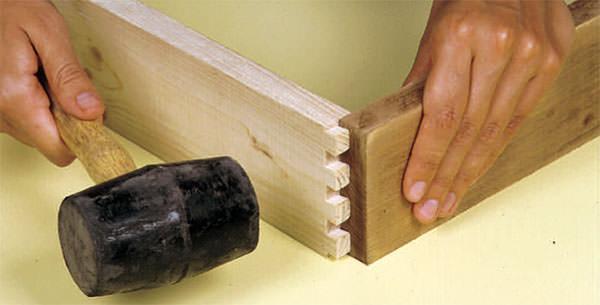
Drawers with dovetail joints can lose squaring.
In this case apply some glue and beat it with a soft mallet head.
In this case you should apply the glue in the seams and fasten with a clamping band.
If the joints are made with pins, we can strengthen them using glue.
Before tightening with a clamp or put the terminal check that the diagonals of the tray are equal, otherwise the drawer is out of square.

Left: A sure way to check if a drawer is perfectly rectangular (not diamond) is to measure its diagonals, which must be strictly equal.
Right: To ensure a safe "shaping" of the drawer you can apply a few turns of twine taut that keeps the joints in contact when gripping.
We facilitate drawer slide by rubbing on the rails a piece of dry soap.
Damage to the shutters
The shutters and other components that turn on hinges or start with outriggers are subject to breakdowns and malfunctions, for loosening the mounting screws or split seat.
You have to remove the hardware, apply glue in the break and put the whole thing in a vise.
If a door strip along the edges and does not close with difficulty, you need to pass the planer on that partdoor of that plane on the strip the frame and then finish with sandpaper.
Splits
A bump on the flat parts can cause a rift.
On subtle elements is done with bonding and finishing of the surface.
On parts of greater thickness, we can insert the pins and then reassemble them.
The broken corners and edges, if they are missing need to be re built shaping a piece of wood alike, paste it into position and refine it.
The joints should be reconstituted with insertions of connecting pieces properly shaped.
The veneered furniture
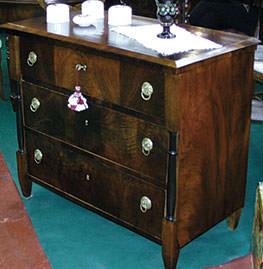 Particular attention should be devoted to the disassembly of veneered forniture.
In fact, to access to an interlocking covered with the veneer, it is necessary to remove it.
To achieve this you place a damp cloth over the veneer and pass over with an hot iron.
Lift up the veneer with a spatula trying to keep it intact to be able to reapply it later.
Animal glue and vinyl glue
Animal glue
It is made with the bones and skins of animals.
It is used in the repair of antique furniture.
It is sold in beads to dissolve in hot water (75 g of paste per 100 g of water).
AIt needs to be applied when still lukewarm on the pieces to be glued which are put in a vise for 8 hours.
It has a good seal but still lower than that of PVA glue.
Vinyl glue
Also known as "white glue" or PVA glue is the adhesive used in most assemblages of wood.
Non-toxic, inexpensive and easy-to-use paste also with many other materials, with particular tenacity.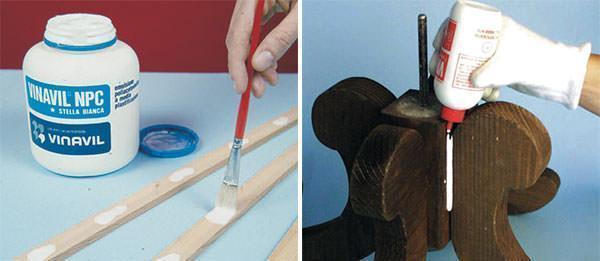
The application is carried rubbing it on one of the two pieces to be joined by means of a brush or by applying it with the spout the special dispenser.
Leave it to dry a few minutes, then the pieces are combined and must be locked tightly with clamps.
The outlet of the final glue is made within 24 hours.
Veneer
Very thin sheet of wood (often a few tenths of a mm) obtained with special processing that should be pasted on wood or panels so as to obtain a surface with a fine finish.
They are available in various types of wood (teak, walnut, rosewood, mahogany, etc.)..
Beware of changes
The repairs to be performed on a piece of furniture can be of varying degrees and can involve more or less extensive parts of the furniture.
In some cases it will be sufficient to run small additions, in others it will be making significant substitutions.
In this regard, remember that a piece of furniture (antique or old) needs to be maintained in its original form until replacements and new contributions do not reach 40% of the total.
In any case it is good to use for the additions, the wood of the same essence and possibly old, recovered from a few fornitures is not repairable.
In the small stock of wood restorer must always be of various types and ages: almost nothing is thrown away!
79741 REGISTERED USERS


