DIY bathroom renovation
Post from EditorialsA good project for handymen with illustrations step by step, to remodel a bathroom in DIY, cheaply!
DIY Restyling of the bathroom
The bathroom environment, small or big, must be designed according to its adequate usability and with regard to the aesthetics and harmonious vision of all the elements that compose it. After a some years, as is well known, even the more modern bathrooms, pride of the most imaginative architects, undergo changes in taste of the fashion home and may become obsolete.
On the other hand, it is true that the replacement of a floor or of the bathroom fixtures will cost significantly different from the restyling of a bedroom, where is often enough just to refresh the color on the wall and to replace small pieces of furniture to renew the environment and bring it back to its former glory.
Notwithstanding the importance of contacting with specialized companies in the field, here is a little project to remodel a small bathroom DIY which will certainly tickle the imagination and the desire to get to work of the lovers of handicrafts.
DIY project to renew the bathroom
The project comes to us from the same channel from which I will present it to you: our beloved web, and it was made by a reader of lavorincasa.it, Fabio Mainiero from Reggio Emilia, born in 1984.
Always fond of manual work, starting with the lego construction he loved as a child, Fabio now works in a tooling mechanics and in his spare time he grapples with small DIY renovations and construction of wooden furniture for his house.
The following photos show the construction step by step of Fabio's project to replace the floor, the lower skirting and the DIY realization of a creative shower tray.
Let's see together all the phases of this mini remodeling of a bathroom.
DIY renovation of a bathroom: the processing steps
First you need to remove the bathroom fixtures, in order to replace properly, or rather to overlay, the existing floor.
In his project, Fabio decided to dismantle the ceramic tiles that made up the skirting, which is the junction of the wall and the floor, because of a color that was not suitable to the combination with the new floor that he would install.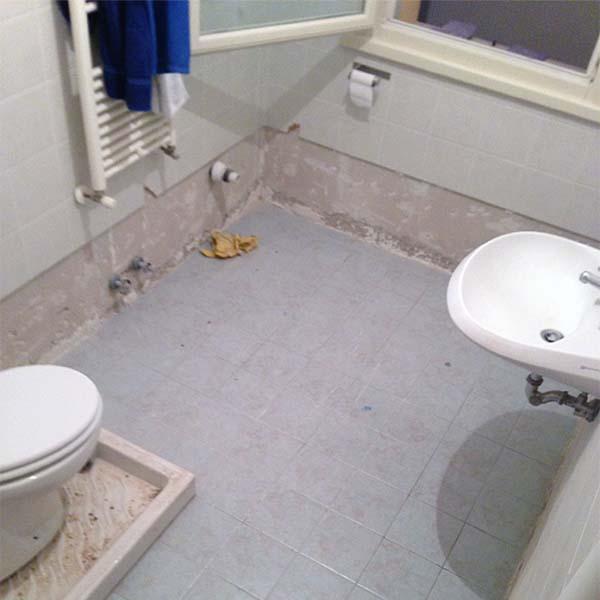
This solution enables you to achieve a good aesthetic result while not providing for the complete replacement of the ceramic coating, which would involve a considerable cost.
At this point begins the actual laying of the new floor overlaid on the first, thanks to the use of a specific fixative for ceramic materials.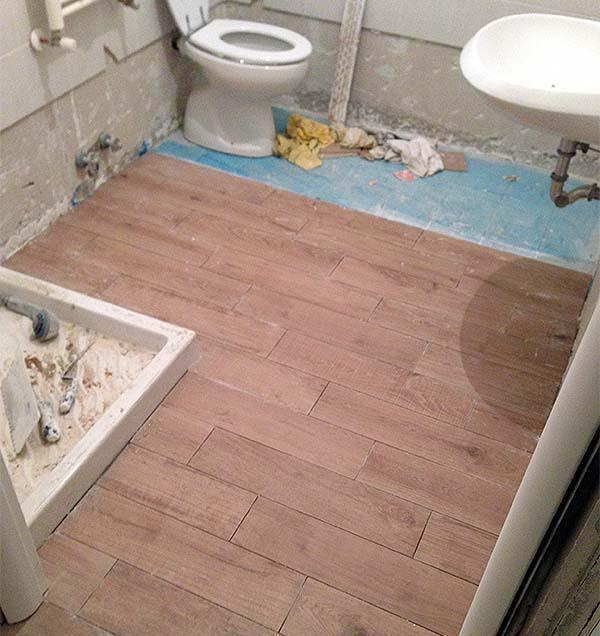
Once the installation of the tiles is done, these are sealed with grout of a hue akin to visually soften the color separation.
In the specific case, the grouting was made with grout that penetrate as much as possible between the joints avoiding water infiltration in the underlying layer.
DIY bathroom: fitting of the wall coverings
Once you completed the floor you move to the application of the skirting; specifically for this project Fabio has chosen to use a tile color burnt sienna, of darker tonal values and contrasting compared to the color chosen for the floor covering. Nevertheless, the color combination is quite appropriate because made with shades more or less intense but neutral tones and moreover put near the white of the existing coating.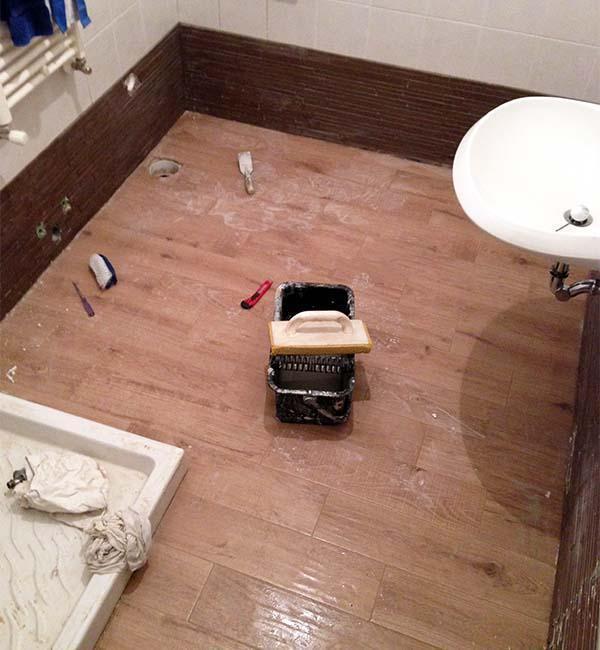
These tiles are in brick shape and you can buy them already placed on a net that facilitates the installation, especially for non-experts.
After laying it it is the turn of the removal of any residual glue on the surface of the tiles and, finally, the plastering of the skirting.
Realize a DIY shower
For the coating of the shower tray Fabio has chosen to use small stones, the ones that sometimes you can also find as a coating of some swimming pools in Spa centers that give to the bathroom a touch of naturalness and originality.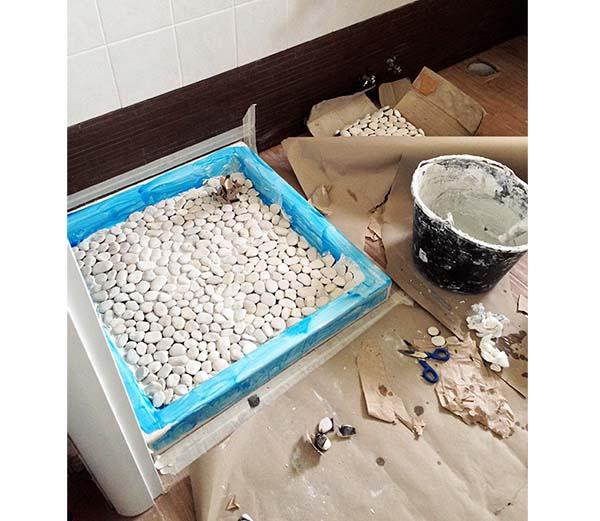
You can find them in stores for hobby and do-it-yourself.
Before applying them to the bottom of the shower, we first need to mark the porcelain of the tray with the aid of a steel brush, in order to improve the function of the fixative, already used to lay the floor.
Pay attention not to forget to make a kind of emptying cap so as not to let that some of the material get in and obstruct it.
Once you have purchased them, the stones can be glued with hot glue on a net that facilitates their installation. When the glue is spread on the shower you need to have care to comply slightly to the conducive tilt of the sewer, so not to create a puddle effect. 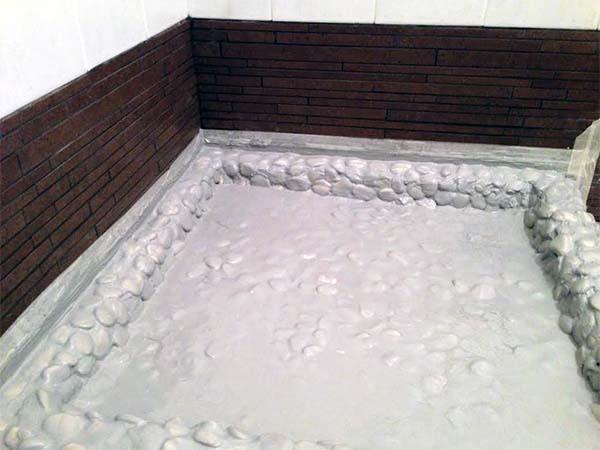
Once the tray is completed, proceed with the side cover around the perimeter edge, trying to select stones of equal size, so as to avoid being left with a surface full of unevenness, particularly in view of the fact that on the edge you will fit the profile of the shower stall.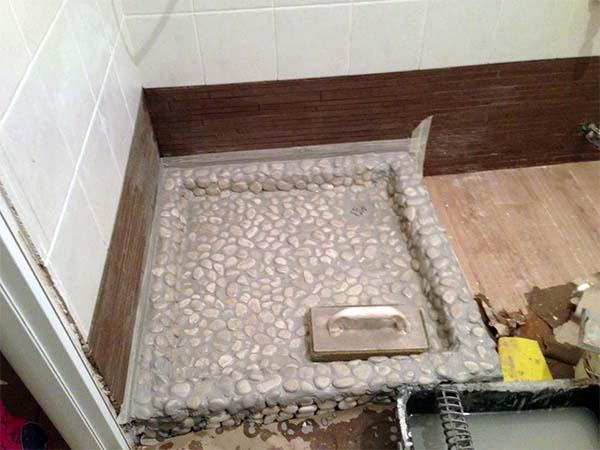
After a day of drying, we clean the excess glue on the surface of the stones, and then we proceed to grouting. The latter is carried out always with grout (grout) so as to fill as much as possible the joints between the stones.
Then move to the removal of the excess grout with a dry sponge and repeat the process after 4-5 hours, this time with a damp sponge, so as to smoothen the grout.
During grouting operations it is important to proceed with firmness and having care to have everything you need to avoid soiling the surrounding floor because grout residues are hard to remove and may leave persisting stains. 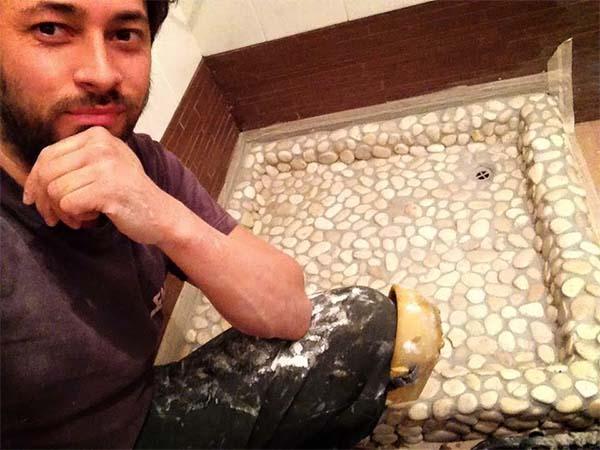
For this project Fabio has used natural bleached stones which should normally be coated with a protective resin, even if, for a choice of taste he preferred to leave them natural.
Once you mounted the pre-existing bathroom fixtures, the new shower stall and you have repainted the interior doors, the project is finished!
How much does it cost to DIY renovate a bathroom?

For the realization of this project Fabio Mainero bought:
- Shower stall in 8mm toughened glass, 50% discount on a shop on-line, 330 euro
- Sink Eban model Ambra, bought at the Fair for 450 euros instead of 1570.
- Porcelain tile flooring 9 mm by Artistica, model Angel, on a online shop at 23 euros per square meter against 42 euros on the price list
- Natural stones by Obi, at 11 euro per sq.m.
- Grout or slurry
- Water paint white silk
Overall, this DIY project has cost about 1000 euro.
79806 REGISTERED USERS


